Welcome!

My niece joined the family on July 12th, 2010. This special young lady's mother is my younger sister, which in classic Chinese culture makes me her Jiu Jiu (舅舅) -- thus the title of this blog. Here I intend to semi-regularly post reflections, thoughts, stories, and assorted whathaveyous pertaining to our trip to China, adoption in general, and (mostly) watching my niece grow up. Since the web is a very public place, I will attempt to maintain my family's privacy while telling the story... but I invite you to follow the blog and come along for the adventure!

Friday, December 18, 2015

It's Thanksgivukkah Again!

Everyone made a big deal about Thanksgiving and Hanukkah overlapping last year... but afterwards I realized that in this crazy family, it's an annual affair. Our cousins down in Florida come up each year to celebrate a combined Thanksgiving/Birthday/Hanukkah holiday, so even if we're not lighting candles in a hanukkiah [1] we'll top off Thanksgiving dinner with a birthday cake, followed by a holiday gift exchange. (We try to pick gifts that pack easily and don't weigh much -- but you'd be amazed at what a little creative thinking can do to prevent that from limiting us to gift cards!)

This year was no exception -- and since Thanksgiving is already long past and Hanukkah 2015 receding into history after it, I figured that I'd better get the combined holiday postings up on the blog before 2015 follows them into the history books...!

As usual, we all gathered at the family's Virginia home, where (as usual) my aunt & uncle did a great job of squeezing everybody in and ensuring no one left even thinking of eating again for at least 24 hours.  The Pipsqueak, being a picky eater (and unfortunately proud of it), concentrated on a pre-packaged mac & cheese and a few other items that she liked, but the rest of us pretty much stuffed our faces with turkey and all kinds of yummy side dishes & garnishments.  I was struck by the difference in the "baby" of the family -- somehow, Cousin S turned from toddler into little girl when we weren't looking! Watching Miri with Cousins A & S interact was fun. Even though there was no replay of last year's "hide and seek" game (with "hiding" usually relegated to giggling noisily almost in plain view between bouts of running through the house making enough noise for an entire elementary school's worth of kids), the three rug rats pretty much picked up right where they left off in 2014 and had a great time playing together. (Dude, you know Cousin A ain't gonna like being referred to as a "rug rat," right...?)

After eating (and eating and eating), we had a birthday celebration for Cousin S (who blew out her candles like a champ) and then everyone waddled into the living room for birthday gifts and an exchange of Hanukkah presents. All us overfed grownups sat watching the kids, catching up with each other and reminiscing while kvetching over having eaten too much... while the family's next generation did all they could to burn off all the calories they'd just consumed. (Hey, who says wisdom always comes with age?)


They're not dancing -- the kids took turns trying to pick each other up!
Hanukkah got underway "for real" a few days later, and the Pipsqueak was super-excited to make her own hanukkiah in Sunday school so (even though it sat proudly nearby with candles at the ready), the familiar old hanukkiah we've used every year since I was a baby remained unlit and we used the very modernistic ceramic tile & aluminum hex nut one Miri made by herself. We got together at Mom & Dad's every night to light the candles together, although the 5th night was a very nervous time for all (Dad had his surgery early that day).

The 6th night (immediately after Dad's surgery), AJ had us all signed up for a special Hanukkah & children's shabbat (sabbath) service at the synagogue where Miri attends Sunday school. Mom & Dad stayed home but insisted we go, so Mom packed a dinner for us to take and sent me off to pick up the Pipsqueak with small cooler & hanukkiah in tow. Traffic was so bad that AJ actually got there a few minutes before we did, even though I had a lot less distance to cover. (By the way, I have no idea who the child in the photo belongs to; Miri insisted she wanted me to take a picture of the big Hanukkah bear in the lobby, and I didn't realize the little girl had wandered into frame.)

The room was crowded with families chowing down on pizzas, sandwiches, and all kinds of other foods along with the latkes (potato pancakes) available for a small fee. We finished off our sandwiches and Miri, as usual, ate her way around the crispy edge of the latkes and left the slightly chewier centers for her mommy and uncle to finish off.

As the service began to get underway, the rabbi invited everyone who'd brought a hanukkiah with them to place it on a large table (thoughtfully covered with fireproof metal foil!)  I headed into the crowd with Miri while AJ took photos from our table on the other side of the room...


That's me in the red yarmulke -- Miri is buried somewhere in the crowd. What the photo doesn't show is the panic on my face as, one after another, already-lit candles kept falling out of the hanukkiah so that I had to keep reaching over other already-lit candles to pick them up and put them back where they belonged. (I had plenty of company with this problem.) We eventually returned to our table with just a couple of lightly-singed hairs on my forearm and enjoyed the sight of 32 hanukkiot as the music- and song-filled children's service began. (The photo above still has a couple waiting to be lit, but there were eventually 224 candles burning on that table -- which, of course, attracted the kids like moths to a flame.) It was also a lot of fun to watch my niece spinning around during the draidel song, followed by a drop to the floor that Sarah Bernhardt herself would've found entertaining.

Gotta tie all that hair back
before playing with fire!
The next night was the last night, but due to Dad's recovery we eschewed the originally-planned big celebration for a simple get-together with our aunt & uncle and Cousin E (who also introduced us to her new beau, a guy we're all hoping to see again). As if we needed another sign that the Pipsqueak really isn't so pipsqueakish any more, she helped her Grandpa light the shamos and then used it to light all the other candles herself, making a wish out loud for each one. As on other nights, without any prompting from the grownups present, her wishes included "peace," "good health," and "a better world" -- what better wishes can one have for the future?

Back when AJ & I were children, Mom started a tradition of giving us each one or two small gifts each night of the holiday instead of something really big (or a really big bunch of gifts) one one night. She's continued this tradition with Miri, with a small tweak: she & Dad prepared eight gifts for the Pipsqueak, and had her pick one each night. Since they were all wrapped, Miri had no way to know what she was picking (although she sure did a good job of grilling Grandma for hints!), so it added an extra dimension of fun to the holiday for her. Still, as important as getting a present was for Miri (and she let us know it was important to her!), we're all proud of how she put an emphasis on sharing Hanukkah with the family, and on the very grown-up wishes she made as she lit each of the candles.

Grownups' hands hovered nearby, but the
Pipsqueak did it all on her own!
Everyone commented on how oddly this year's  candles
burned -- we usually don't get such big blobs of wax!
And on that note I'll bring this year's accounting of Miri's Thanksgivukkah to a close with wishes for a happy, healthy holiday season for one and all!


[1] The hanukkiah  (plural: hanukkiot) is a special version of the menorah (a multi-branched candelabrum) that's used for the holiday. The names are semi-interchangeable, but while some menorahs have three branches on either side of a central candle holder the hanukkiah always has four. The central candle, called the shamos or shamash, is lit first, and then it is used to kindle the other candles -- one on the first night, two on the second night, and so on until all eight "lower" candles are lit on the last night of Hanukkah.

[2} Thanks to centuries of transliteration from Hebrew or Aramaic into Western languages, Hanukah, Hannukah, Hanukkah, Chanuka, Chanukah, Chanukkah, Khanukha, and eleventy-seven other spellings are all actually the same holiday!


Friday, December 11, 2015

Boing! Boing! Boing! Boing!

NOTE: I had this post just a few lines short of being publish-ready almost two weeks ago... see the last couple of paragraphs for an explanation of the delay.

Sometimes "Uncle Duty" puts me in interesting positions. Like the time a year ago when I took the Pipsqueak to a friend's birthday party and found myself the only adult male in the waiting room as the kids bounced (literally, at times) all over a gymnastics... um, gym.  No matter which window I stood by or which little clump of mommies I tried to stand near, I always found myself separated from all the other adults by more space than they kept between themselves. I think it was only when I followed everyone into the party room for pizza & cake (at which point a couple of daddies joined the crowd) and began helping set up & serve that anyone realized I was chaperoning one of the kids and not just some weird guy ogling their children. (I think I actually said that verbatim to one of the moms, who cracked up -- but had a slightly guilty expression,  too!)

Imagine, then, my joy  when AJ pointed out she had to work on Sunday, and Mom & Dad were really tired, but Miri had a birthday party to attend... and was really looking forward to Uncle Brian taking her...

 I'm not one to disappoint my niece so I spent the next several days reminding my sister that I needed to know the time and location of the party. Eventually, she sent a text message(!) with the time and place: SkyZone, a huge all-trampoline indoor "park" where the kids could burn off as much energy as they could muster.

I picked up the Pipsqueak on time(!) and she talked nonstop aaaalllll the way from Grandma & Grandpa's house to SkyZone. There didn't seem to be much parking (uh-oh) but I found a spot a short walk away and my thoroughly wired niece kept up her soliloquy all the way to the entrance.

We both got real quiet when the door closed behind us -- the noise level in the place was somewhere between "the U.S. Olympic jackhammer team is practicing here" and "there's a 747 throttling up in the back of the room." There were humans of all shapes & sizes in orange nonskid socks everywhere, moving every which way, and when I asked Miri if she saw anyone she knew the reply was a worried negative. I eventually saw what looked like a customer service desk and guided the now slightly overwhelmed Pipsqueak in that direction.

I opened my mouth to ask where the party was and realized AJ had neglected to give me one teeny-tiny bit of information: neither Miri nor I knew the birthday girl's family name, which made it kinda hard for the very patient girl behind the desk to tell me where the party guests might all be located in the chaos. She finally directed me to the opposite side of the building (did I mention this place is BIG!?), where the first thing I was asked by the girl behind that particular counter was if I had completed the liability waiver in advance.

Oh, this is fun -- not only do I not know who the heck I'm looking for, but I was supposed to have already filled out a liability waiver...?!? 

I dragged my increasingly lost-feeling niece over to an open computer terminal and shortly afterward was able to return to the sign-in desk --where I was super-relieved to run into the birthday girl's mom (whom I recognized). A few moments later, the Pipsqueak had swapped her sneakers for a pair of bright orange nonskid socks and the entire party group went to one of the large net-enclosed "pens" whose floor consisted entirely of trampolines linked together. I noticed one of the fathers actually shooting photos from the bouncy floor (in bright orange nonskid socks, of course) and the birthday mom said adults could also bounce if they wanted, so I let Miri know I'd be right back and returned to the sign-in desk for my own bright orange fashion statement.

Unfortunately, as soon as I mentioned "photos" the girl said they allowed photos but no cameras or electronics were allowed on the trampolines themselves. I decided not to rat out the other father and went back to shoot my pics from the regular floor. (By then he had given up his camera so he could keep bouncing with the kids.) 

From that point forward, the afternoon became one long demonstration of just how much energy kids in 6-8 range actually have... and how difficult it is for old geezers like yours truly to keep up with them. The noise level remained astonishing, but after a while I was able to tell apart the high-energy music blasting from the PA system from the kids' yelling while following said kids from the bouncy pen to the foam pit (on the far opposite side of the facility, of course) to a larger bouncy pen and back to the original, all the while dodging other kids and adults who were either being equally energetic or equally overwhelmed.

Miri may be a pipsqueak but she held her own, happily running along the padding between trampolines or bouncing all over the place. I'll be quiet for a moment and let y'all see what it (sort of) looked like -- believe me, the blurring in the photos was almost visible to the naked eye!

Here's the foam pit...


...and here's the bouncy pen the kids spent most of their time in:


At one point I turned to one of the young "lifeguards" and jokingly asked if employee benefits included unlimited Excedrin.  After I explained what "Excedrin" was (Dude, you're getting old!), he laughingly said that it sounded tempting, but that the staff all got used to it pretty quickly and, besides, "it's only like this on weekends."

Still feeling slightly overwhelmed by the nose and activity, I cringed as the lifeguard blew his whistle to signal the end of "bounce time" and followed the group to a couple of party rooms for pizza and cake. Many of the adults (including me) were happy to discover the birthday girl's parents had arranged for separate party rooms for the kids and their grownups, older siblings, caretakers, etc. -- a very nice touch I'm going to remember for future plans. Everyone jammed into one room for the obligatory loud yelling singing of the "happy birthday" song but then it was back to the much quieter "grownups room" for some pizza and root beer.  Eventually the Pipsqueak decided she'd had enough loud noise and wanted to leave, and within minutes it seemed like many of the other kids agreed so we headed home for her to describe her trampolining ability to Mommy, Grandma and Grandpa.

"So," I hear you say, "why did it take more than two weeks to type & publish this post?" Well, we seem to have run into some uncharted shoals. First, I became unemployed at the end of November (yep, you read that right, unfortunately -- don'cha love downsizing?) Then Dad developed a problem and there was an ER visit & a couple of doctor's appointments... Then Mom had a problem and there was another ER visit... Then there were a couple of additional appointments for Dad, followed by what turned out to be very successful semi-minor surgery early on Thursday. (I say semi-minor because he didn't have to stay in the hospital overnight, but there was still some definite slicing & dicing going on that had all of us thoroughly concerned.)

What's been keeping our spirits up during the repeated "uh-ohs" and doctor visits has been how the Pipsqueak's been keeping her grandfather in line. (He's quite bad at following instructions like, "don't bend," "don't lift," "don't climb stairs," and such.) She'll draw herself up to her full height, hands on hips (sometimes wagging a finger at him for emphasis) and start off with, "DAD! You have to listen to me!" and then spend the next several minutes lecturing him on how he should behave and why. The funniest was when my cell phone rang just as we were leaving the ER one night and I found myself talking to my niece. I asked if she wanted to speak with Grandpa (she was really, really worried about him) and gave him the phone -- and Miri spent the next 7-8 minutes politely reaming out her grandfather for not behaving himself while Mom & I tried to not laugh out loud.

It's been a wild couple of weeks but things are (finally) looking much better -- and now we know that if we can't get Dad to follow his doctor's orders, we just have to stand back and let his granddaughter deal with him :-)

So now that we're all (almost) up to date, I'll sign off with an almost-belated HAPPY HANUKKAH! to one and all! (Miri's been unintentionally amusing us by asking friends, "Are you Jewish or Christmas?")


Saturday, November 14, 2015

And So It Begins...

Every now and then I've referred (usually in passing) to some of the issues adoptees face that are simply not part of the everyday life of non-adoptees.  Even back during the long wait to meet Miri, we would sometimes discuss how we would approach the expected questions as she grew older. There was never any question of trying to hide the fact that she was adopted -- as if the obvious physical differences would be invisible! -- and we have always kept an eye out for good resources, information, etc. on how to discuss the various issues associated with adoption once the Pipsqueak was old enough to really wrap her head around it.

(What issues, you ask?  Howzabout explaining to a six year old child why the family she was born into put her down one day and walked away?  Miri was lucky, being left at a medical center; we know of children who were found in a box in an alleyway, under the bench of a bus stop, in a dumpster, in a sewer... and despite knowing their Finding Spot, no one can tell them where they were actually born with more certitude that the name of the county.)

In any case, we long ago decided to be as matter-of-fact as possible about adoption, and to let the Pipsqueak set the timing & pace of more advanced discussion.

I suspect some of those discussions will be starting very soon.

Y'see, a few of Miri's classmates mommies are pregnant, and the kids are excited about having new siblings on the way.  Somewhere along the way, the most basic of "where do babies come from?" answers began making the rounds leading to the following question the Pipsqueak presented to her Mommy earlier this week...

"Mommy, if babies come from their mommies' tummies but I was born in China and didn't come from your tummy, where did I come from?"

This is gonna be interesting; I'm actually looking forward to seeing how my smart little niece processes this...

Tuesday, November 10, 2015

Halloween 2015

Set your WABAC machine to 1964, when the earliest of my own halloween costumes that I can remember was Astroboy (yes, I'm that old!) Of course, in those days the whole idea of tie-in merchandising -- especially for a Japanese cartoon -- was unheard of, so Mom cut holes in a big box for my arms to stick out of and a larger hole for my head to stick out of, and then (with vociferous guidance from yours truly) used magic markers to make it look roughly like Astroboy and off I went trick-or-treating with a friend. I don't remember his costume, but I do remember my next-door neighbor scaring the freakin' daylights out of us by answering the door with a big kitchen knife in hand.

In ensuing years there were ghosts, and pirates, and hoboes, and even a nondescript big brown something-or-other -- the only costume to actually win a prize at a halloween party! -- but in reality nothing terribly "different." (Unless you count the $40 full-head lizard monster mask with long blonde hair that I splurged on one year in college, with big green 4-fingered clawed hands and a big brown cloak, and a pair of old jeans I spent an entire day sewing blonde fake fur material onto to match the mask... still have the mask & claws, too!)

Fast-forward to the post-China years, and the Pipsqueak's also gone the "predictable" route. Her first halloween costume wasn't much more than a "My First Halloween" bib, but then there was a princess, and another princess, and then Elsa (from "Frozen") and then this year...

Well, this year my niece did something a bit different.  If you read my "A Trip to Pennsyltucky" post last month, you might remember a photo of the world's largest crayon at the Crayola Experience in Easton, PA. It looked a little like this:


Well, as interesting as I thought it was, the big blue behemoth apparently really impressed the Pipsqueak because her Halloween costume this year was...

...a big blue Crayola crayon!  (Who woulda thunk it?!?)  I took the photos below at her school's annual Halloween parade, which luckily is early enough in the day for me to zoom over to see and then zoom back home to change for work.


There were scads of princesses, doctors, superheroes, cowboys & cowgirls, ninjas, warriors, werewolves, vampires, zombies, and so on, but only one other crayon -- and that little girl wore a pink dress with a tutu-style skirt, so it really didn't look like a crayon at all. Leave it to my niece to be the single rugged individualist in a school with hundreds of students!

After the parade was a dance party (I don't know how Miri danced in that tubular costume,  but AJ has video to prove she did). The next day -- Halloween proper -- Miri participated in a "Thriller" dance flash mob(!) at a nearby shopping center without the costume, but later on she again donned the blue tube and pointy blue hat and had fun trick-or-treating with one of her BFFs from school. I joined AJ & Miri at their house later that evening (some longtime friends had stopped by for a visit) and she told me she got lots and lots of candy -- "like a hundred pounds!" before offering to share exactly one piece with her uncle. (Dude, that's one piece more than you usually shared with your family, right...?  Shaddup.)

I don't know what Miri will be next Halloween.. but it's sure to be interesting...!

Thursday, November 5, 2015

The Saga of the Toy Chest, Part 3

I was beginning to feel a little desperate. More and more of my time (in addition to more and more of my budget) was being taken up by what was supposed to be a cheap & simple project, and with less than a month to go I was literally starting over almost from scratch.  I had already told my family what I was doing, and just before the latest disaster had told Miri what I was going to give her for her birthday.

Nope, no pressure... sigh.

I now had to sand off all the paint I had so carefully sprayed onto all the panels, then do all the preparation I should have done to begin with, then move forward with the painting, tracing, coloring, and so on. The problem  was (very much like in school) the math; each coat of paint needed time to dry before another coat could be applied, I could only paint one side of each panel at a time, and I only had room to work on two or three panels at a time. I had finally reached the point where there were not enough hours left before the my original deadline to finish the project.

I flirted briefly with the idea of abandoning the project altogether, or at least buying something closer to the desired finished project, but knew that would be a cop-out of major proportions... not to mention that stubborn streak way down deep inside that simply would not accept losing an argument with an inanimate object. (And did I mention the terribly empty feeling in my wallet...?)

Thus it was that I began spending part of every afternoon, plus a few hours late each night after work, alternating between sanding Trogen panels and vacuuming up a seemingly infinite volume of paint dust. On some panels, I had to be extra-careful to not sand away the factory-made cutouts for hinges and other fittings, while on others I simply had to make sure I didn't accidentally change the shape of any edges or corners.

It took a week, but I finally had (mostly) all the paint removed. Musing on how the stuff wiling to jump off the Trogen on its own when I didn't want it to, but required so much work to remove when I did, I spent the next several days gently sanding off whatever it was IKEA used to kid-proof that neon yellow finish, starting with a medium-grit sanding sponge and working my way down to extra-fine. Finally, well into June, I was able to begin painting the darn thing again.

As the sanding dust in my house was replaced by bright white "dust" consisting of spray paint particles that dried in midair, the now not-so-neon yellow panels began to once again turn white; three coats of paint (and another week) later, I was ready to Olafize the panels again, starting with the front panel. This time there were no "little rough spots" or alien-looking bubble patches, and I was able to heave a sigh of relief before pushing onward.


However, there was a new problem: I was exhausted. I work a late shift, often getting home at 2:00am or later, so working on the chest after work meant I often went to bed as the sun was rising. Desperate to get the project finished, my life devolved into job - work on the chest - nap - work on the chest - job - repeat, with only an occasional interruption. This served to increase the level of insanity that had let to my undertaking the project in the first place, and it wasn't long before Mistakes Were Made.

Luckily, the one that made me realize I needed to spend more time sleeping than painting or tracing was a minor goof. As usual, I spent a little over 30 minutes carefully tracing a picture of Olaf onto one of the panels. I finished & carefully pulled everything away from the panel... and found the same all-white surface I had started with, nary a bit of Olaf anywhere in sight. I sat there too puzzled to even cuss (not like I hadn't had a lot of practice with that, lately!) and then looked at the paper I'd printed Olaf on and burst out laughing. There, on the back of the page, was a mirror image of the picture I had traced -- I was so tired, I had oh-so-carefully put the graphite paper in place with the business side facing up instead of down! I didn't even bother moving everything into the usual piles -- I just turned off the lights and went upstairs to bed.

By this time, Miri had gotten into the habit of asking, "So how's my chest coming?" any time I spoke with her.  (For a kid about to have her 6th birthday, her command of sarcasm was a little scary -- funny, but scary.)  It finally had to let her know her birthday gift would be late, and I took great pains to explain to her how hard Uncle Brian was working.  Luckily, my niece often lets me get away with things her mother didn't at the same age, so she was forgiving as long as I kept her up to date on how the project was progressing.

And it was progressing. Once I'd gotten enough sleep to think (and see) straight again, all that practice I'd had on versions 1.0 and 2.0 of the project enabled me to cruise through the remaining work. Aside from the discovery that the graphite lines I was inking over clogged up the tips of the black Sharpie pens I was using (causing me to have to buy more by the time I was done), it wasn't long before the panels were ready for clear lacquer, getting clear lacquer, or having their clear lacquer drying in preparation for the next coat. My house again reeked of spray paint and there were Trogen panels all over the place, but even as June 20th came and went I was so close to completing the chest that I could practically smell my impending success. (Or maybe it was a combination of spray paint and Sharpie ink I was smelling; by that point my olfactory nerves had all packed up and flown to Vegas without me.)

Finally, the last set of panels was curing and all the others were stacked neatly against the dining room wall, ready for assembly.  Even the lid was done, a three-day nail-biter that saw me repeatedly stenciling - erasing - stenciling letters until everything lined up and got the Sharpie treatment in bright pink. With a smile I couldn't get rid of, for the first time in nearly three months I packed all the markers, paint pens, cans of spray paint, sanding supplies, and tools away.  I located the small plastic bag of IKEA hardware necessary to hold all the Trogen parts together (I'll leave my emotional state when I was at first unable to find the darn thing to your imagination) and was finally ready to FINISH! the project...

But first... Throughout the project, plans had been jelling for a big mid-July family get-together to celebrate a bunch of birthdays (we seem to have a genetic predisposition for the late June - early July timeframe).  Since my house was the only local family abode not saturated with feline furriness, I would be the host -- adding the need to rearrange the entire first floor to make room for relatives from three other states to my list of stressors.

Somewhere around the time I used the graphite paper backwards, a dim bulb went on over my head.  I had been scrambling to clear enough space in which to work, shoving pieces of furniture here or there and back again... but there's that big ol' queen size sleep sofa that hasn't been slept on by anyone for at least a decade... and it takes up a lot of room... and it's not even comfortable to sit on anymore... hmmm...

Thus I postponed the final assembly a couple of days until my new-found friends at 1-800-GOT-JUNK could come by and cart off the old sleep sofa (not to mention the dead 32" old-style TV that had been sitting in the middle of the living room for several months until I could find time to take it to the dump). Once it was gone, I was amazed at how much space there was, and mentally kicked myself for not doing that at the beginning of the project.

I also mentally kicked myself a few times when I went to vacuum up all the "stuff" that had accumulated under the sofa & pulled down all the paper that had protected the oak railing from paint overspray.  See all the white floor tiles in the photo? They're supposed to be cream -- and that's not dust on the base of the railing, it's a layer of fine white paint particles that required several cuss-filled hours of careful, gentle sanding to remove.

One the cleanup was done, I set about interpreting the instructional IKEA heiroglyphics. (Even when I worked there, it wasn't uncommon for one of the crew to get most of the way through assembling something only to discover a part was on backwards or upside-down.) There were a few anxious moments dealing with the lid's balky soft-close mechanism, but all the parts came together and in no more time than it would take me to trace a single Olaf picture I had a real live actual shiny white Olafized toy chest in my living room!


All that remained was to present it to the Pipsqueak. After arranging the remaining furniture, I moved the chest into the foyer area and pushed it up against the poor abused oak railing. Shortly before everyone arrived on the day of our get-together, I simply covered it with a bedsheet and made a point of ignoring it when AJ and Miri arrived.  Eventually my niece's curiosity got the best of her, giving me the chance for a very satisfying Grand Unveiling to an appropriate collection of oohs and aahs.

It had taken three solid months of sometimes physically painful work, about $160 worth of assorted supplies (including a new toy chest), and weeks of paint fume-induced headaches and/or overspray-induced sanding, but Miri had a shiny new Olaf toy chest for her things!

Lessons Learned
  1. Always prepare any surface to be painted with careful cleaning and enough light sanding to remove any surface coatings that might reject the paint you want to apply.
  2. Just because the label says your chosen paint will adhere to nearly anything, do NOT skip preparing the target surface.
  3. When the IKEA catalog says something has a clear lacquer coating... see #1 and #2 above.
  4. Make sure you fully understand the difference between (and capabilities of) ultra-fine, fine, and chisel point markers & pens, and experiment on a surface like the one you'll be using them on before spending money on an entire collection of the wrong type.
  5. Make sure you have at least 1 or 2 extras of any critical tool (e.g., black Sharpie markers for inking over pencil/graphite lines). Make that 3 or 4 extras, you can always use them for other things later.
  6. Spray paint goes everywhere no matter how carefully you aim; put at least as much effort into protecting every surface within several feet of where you're spraying as you do into any other part of the task.
  7. If you're using spray paint, think ventilation. Lots of ventilation. No, more than that.
  8. Plain white spray paint will accentuate any cracks or defects on a wooden surface. It will not make them less obvious to the human eye no matter how many coats you spray on.
  9. There's a reason cheap spray paint is cheap and expensive spray paint isn't. If you care about your project, it's worth a couple of extra bucks per can to get a good finish.
  10. Make sure you have enough room to work in comfortably; it's much easier to make a mistake when you've had to fold yourself into an odd shape just to fit into your workspace.
  11. If you're going to trace a design, print the design lightly enough to easily see which parts you have or have not yet traced.
  12. Remember Cheops' Law: "Nothing ever gets built on time or within budget."
  13. "Grease" is not the word. "Patience" is the word. (And keep your sense of humor close by.)
  14. If you can custom-make something yourself, it's a whole lot more satisfying than just gifting someone with a store-bought version.
Epilogue

After all the trials and tribulations, Miri's toy chest was finally gifted to her in mid-July. It is now the first week of November, and the darn thing is still sitting exactly where I put it on that day.  AJ keeps begging for more time to figure out where she's going to put it, and despite my repeated statements that it should not be added to her living room so much as replace some of its current overflowing contents, she just hasn't had the time to figure out what to do. So the Olafized Trogen sits just inside my front door, waiting anxiously (as do I) for my sister and niece to find just the right place for it in their home.  Miri comes over to visit it once in a while, and every now and then I stop to admire my own handiwork...

...but I'm really hoping Miri gets to use it at home before she goes away to college! <sigh>


Monday, November 2, 2015

End of An Era


Just a note before posting the 3rd (and final!) chapter of the Toy Chest Saga...

My email had piled up for a few days, and when I was going through it just a few minutes ago I found a message dated October 29th that signals the true end of an era for the international adoption community (especially the China families).

For many years, one of the "in" jokes for families adopting from China was, "You don't know who the Rumor Queen is but you know who the Rumor Queen is."  RQ did an excellent job of hiding her real-life identity and an equally excellent job of maintaining a massive website and multi-thread discussion forum for any and all folks interested in or going through the process of adopting a child from China (over the years, a few discussion threads for other countries went active).  The URL "chinaadopttalk.com" was one of the first things memorized by most adoptive families, and the information available on the website and in the forums (as well as the much-needed chance to air concerns, fears, frustrations, etc.) provided a service absolutely unequalled anywhere else, including a scary-accurate and regularly updated set of charts & tables showing when the writing families could expect to reach the various milestones in the process.

I signed up for an account a few months before AJ was matched with the Pipsqueak, and probably learned more about what to expect in that short time than in the previous 3-4 years. Even after returning home, I returned to the forums regularly to share my own information and just sort of reminisce about The Wait... and enjoy the periodic new links to various blogs and online videos in RQ's much-anticipated "BABIES!" posts.  Then, a couple of years ago, over the course of just a few weeks, RQ removed her presence from the forums, and (even though a small group of dedicated administrators continued keeping things going) the updates petered out. The forums remained active (sometimes very!) but the feel of the place was changing.  Most of the old-timers began trickling away, and soon I found myself logging in only a a couple of times a year, mostly to see if there were any familiar voices in the forums or to see if there was anything I could contribute (less and less, to be honest). And then I opened the email from October 29th.

For those in the adoption community who may read this blog but did not use the RQ site and forums... ChinaAdoptTalk.com is gone.

There's a new Facebook group starting up, but there's no way it'll be the same -- the international adoption community has lost a wonderful, valuable resource.

RQ, whoever and whereever you might be, THANK YOU! for all your years of effort and support to this adoptive uncle and the entire community. You have more than earned the right to move on with your life, hopefully secure in the knowledge that you performed a much-needed service above and beyond the call of duty with little more reward than knowing you were doing so & the occasional "thanks" from the site's members & visitors. You will be missed -- and you will always have our gratitude.

But somehow I feel like a group of friends have all moved far, far away...


Tuesday, October 27, 2015

The Saga of the Toy Chest, Part 2

So there I am, a whole month of buffer time gone, and I have exactly ONE panel of the Pipsqueak's new toy chest ready to roll.  Not even a front or side panel... No, the bottom. As in, the part that's gonna be absolutely buried by all her stuff so those cute lil' Olaf faces will probably never see the light of day once she starts actually using her gift.

I realized that I had to get moving. Like, fast.

The largest, most exposed surface would be the lid, and I still had absolutely no idea what image to use. I had Olafs picked out for the front, the sides (same image, mirrored for symmetry), even the back -- but that big ol' top had me stymied until I had yet another brainstorm.  I'd bought a set of alphabet stencils to put Miri's name on the chest, why not just do it up a little fancier?  All I had to do was line up the stencils, draw gently around their edges with a pencil, ink over the lines... yeah, easy as pie.

That was the theory.  I laid out the stencils to test-fit the letters onto the lid, and discovered yet another totally unexpected problem.  Here's the uppercase M, here's the lower-case i, here's the... Uh-oh.

The stencils didn't line up.

I was going to have to measure each letter, figure out the spacing, and come up with some way to make sure they lined up properly, with no guides on the stencils themselves.  Since I had saved the long pieces of clean newsprint that had separated the Trogen panels in the box, I had a nice long piece of paper to experiment on so I set to work.

Two sweat-, anxiety-, and cuss-filled evenings later. I realized that This Ain't Gonna Work Either. Sitting on the living room floor staring at a long piece of paper covered with erasure marks and only three letters, I began to wonder if I should just go out an play in traffic when I flashed back to all those old penmanship notebooks from 3rd grade. Parallel lines, I thought, a baseline for the bottom of each character, another for the top of the little letters, and another for the top of the big letters. Half an hour later, I had my guide lines oh-so-carefully drawn (very lightly) in pencil on the top panel and was ready to begin tracing the letters from the stencils.

Then I realized the stenciling would be relatively simple but that I still had a whole bunch of Olafs to trace & color, and they would be more fun than the fakakte lettering... So I put aside all the stencils and began working to Olaf-ize the front, side, and back panels.

Being old enough to remember how messy carbon paper was, I thrilled at how much less smudgy the graphite paper was, and how easily it cleaned up with a pencil eraser. The real trick was holding the picture I was tracing securely enough to prevent any twisting or sideways motion that would distort or break up the traced image. Slowly, stopping every few minutes to just breathe and mop my brow or shake a cramp out of my hand, I traced over the printed Olaf image with a ball pint pen.  Slightly more than half an hour later, I carefully lifted all the paper away from the Trogen and marveled at the "penciled" duplicate of the Olaf I had traced.

Um... wait, why is part of his arm missing? And where's that 3rd coal button on his front...?!?  I realized that my mistake (yep, just one more in a long series) had been to print the images in black ink and trace them with a black ballpoint pen -- making it nearly impossible to see if I'd missed tracing over any of the lines.  Thoroughly annoyed with myself (again), I carefully carefully CAREFULLY! lined up the printed image with the transferred version, slid the graphite paper underneath, and added the missing bits. I took a short break, then took a really deep breath and prepared to draw over the faint graphite lines with the ultra-fine-point black paint pen I had bought earlier that day.

I primed the tip as per the instructions by pressing down repeatedly on a wad of clean paper, then began inking over the graphite lines with black paint. It only took a few lines for me to realize the point of the paint pen was too fine, because I was having to work hard to make some lines thick enough to cover the design properly. Then I noticed that the graphite was clogging the tip and paint wasn't flowing quite as well as before. When I went to re-prime the pen, it made a quiet little "blurrp" sound and left a biiig bubble of black paint wobbling on the surface of the priming page.  Amazingly, none of the paint soaked all the way through to the carpet... but the paint pen was dead and Olaf only had a bit of his head inked in. In desperation, I grabbed a fine point black Sharpie that was laying nearby and it did just as nice a job on large pictures of Olaf as it had done on little images of his head (plus angling the pen differently would give me the thick or thin lines I needed).

I noticed the side of my hand was smudging the graphite lines a little, so I kept a clean piece of paper between my hand and the surface and that particular problem was solved. I stopped partway through to make sure I hadn't yet again led myself astray, and decided I liked what I saw; ten minutes later (by which time it was well into the wee hours of the morning) I had a complete line drawing of Olaf right where I wanted him.

I decided to color in the picture before proceeding with any others, so the next day I returned to the crafts store and bought a package of assorted colored Sharpie markers, plus a couple of individual chisel-point Sharpies in light blue and orange for Olaf's mouth and nose (the largest expanses of color) plus another couple of the fine point black markers.  After work that night, I tore open the package of colored Sharpies and, after some experimentation, discovered that lots and lots and lots of teeny-tiny minuscule little strokes (aided by the occasional on-purpose smudging with a clean finger) gave me even coverage of larger areas. By the time 4:00 a.m. rolled around, I was able to go up to bed with the satisfaction of having completed one complete Olaf image in full color.

The next day I had a brainstorm on how to avoid the "invisible tracing pen" problem. The images were just black-and-white line drawings, so I converted the digital files to greyscale, increased the brightness and decreased the contrast. Voila -- light gray lines that were plenty dark for me to trace but light enough to easily show if I'd missed tracing over any of them with my pen! Feeling like a real pro, I got the 2nd Olaf onto the Trogen's front panel, even finishing the task 45 minutes earlier than the first.

I went to bed thinking I'd just press through and Olaf-ize each of the other panels in turn over the next few nights, but woke up with the realization that I had no idea how the colored Sharpie ink might interact with the clear lacquer that would be covering everything -- so I pushed all the drawing supplies to one side, opened the front & back doors (I was getting tired of breathing paint fumes all the time), and sprayed on the first coat of clear lacquer.

Lookin' good, Dude.

I waited the recommended 20 minutes and gave the panel a close viewing. So far, so good... maybe a rough patch, over there, but nothing another couple of smooth coats of lacquer wouldn't fix.  I applied  the second coat, gave it a close review, and left it to sit for the recommended 20 minutes before spraying on the 3rd and final coat.

Lookin' good, Dude.

I grabbed a bite to eat, put a load of laundry into the washing machine, gave the can of lacquer another good shaking, and went to spray on the final coat.

Looking' g- What the hell is THAT...!?!?!

The "that" was the little rough patch I'd noticed after the first coat. Only it wasn't a little rough patch anymore. It was a region of white paint being lifted clear off the front of the Trogen by the lacquer as it dried, visibly growing in size as I watched.  (Remember at the end of my last post where I mentioned heartbreak? Well, there it was, big as life and growing like some unwelcome alien fungus.)

All of a sudden, I was regretting taking the shortcut of believing the "sticks to all surfaces" statements on the Krylon 2X cans and not doing any sanding of the Trogen.  I don't know what kind of kid-proof clearcoat IKEA uses, but it sure as all get-out was repelling my "sticks to anything" paint... and just putting the two Olaf images on this panel and spraying the one side with the clear lacquer had taken me three days.

I gave the panel a closer inspection and found more patches of the unwanted bubbling slowly appearing.  Luckily none overlapped the Olafs, so I decided to save time by spot-sanding and then spot-painting the patches instead of stripping the entire panel and starting over from scratch.

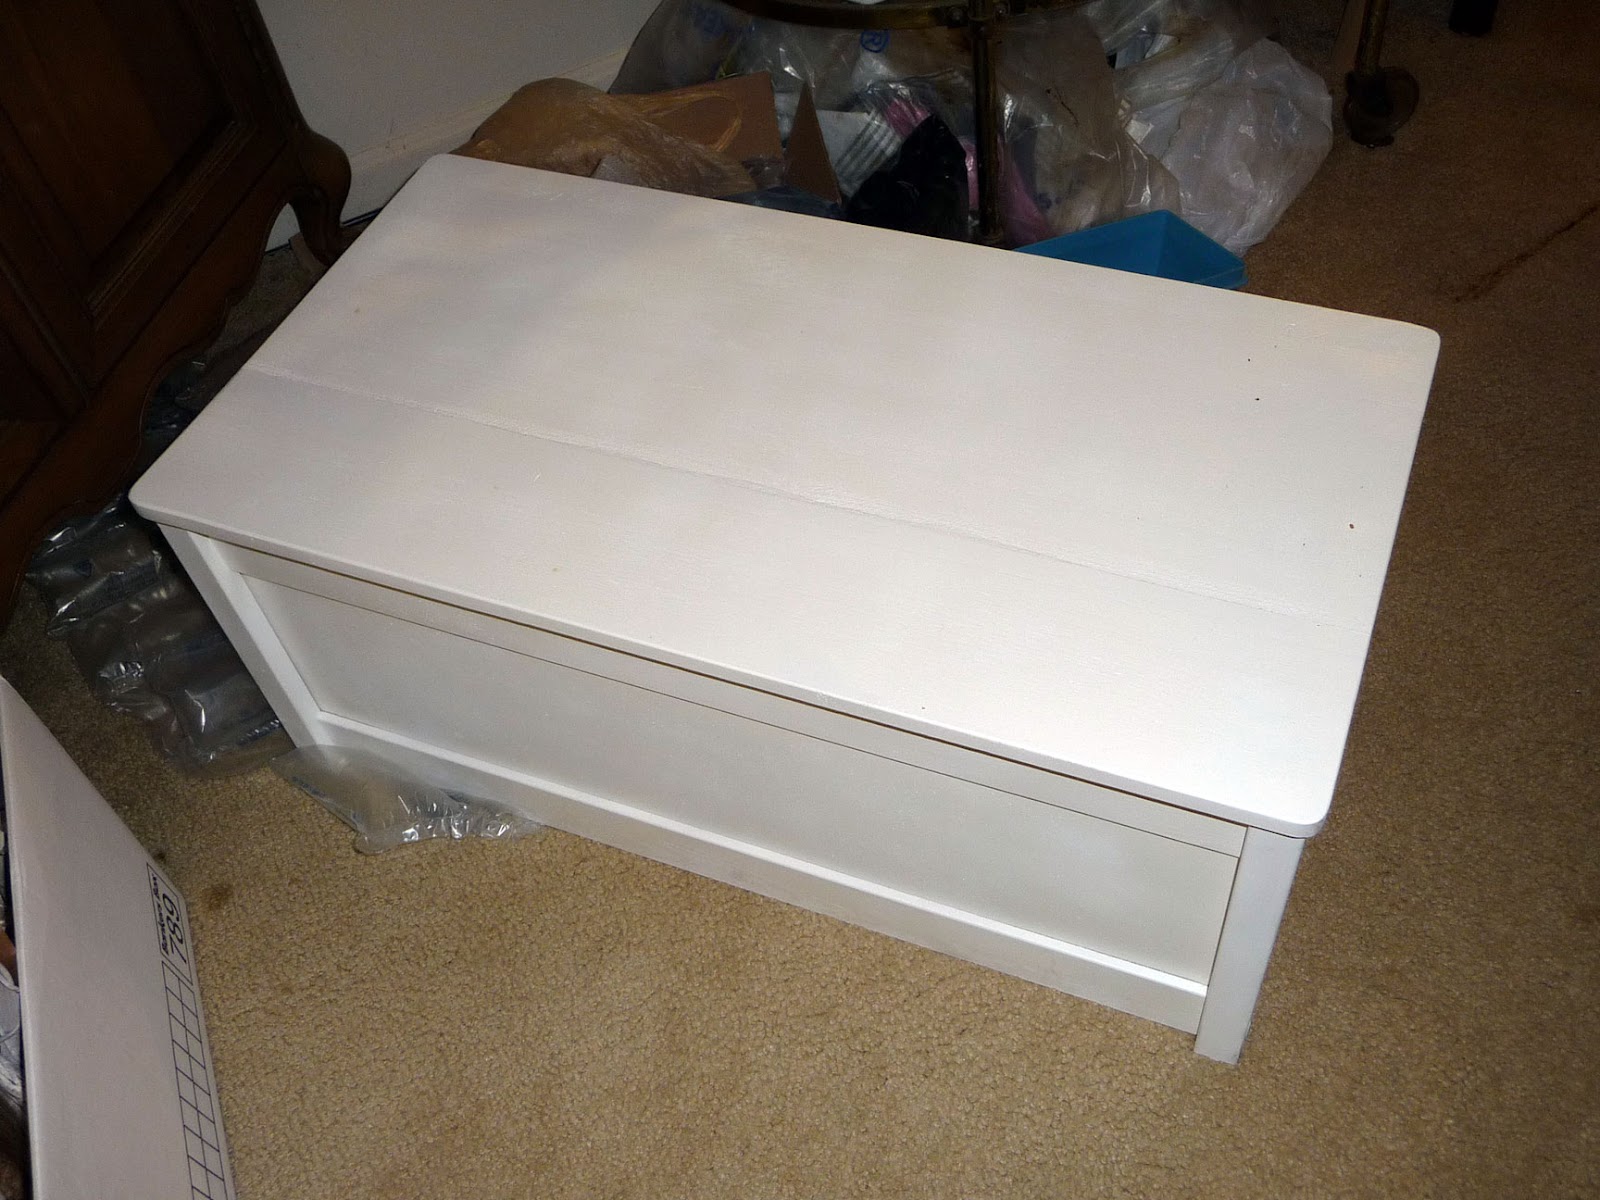
You'd think I would've learned my lesson by now, but nooo...  In my defense, I did mitigate this particular bout of insanity by deciding the first thing to do was carefully inspect every one of the Trogen panels by sight and touch to weed out any more "little rough spots" that might cause future heartbreak.  Spot-sanding the front panel would be a little tricky since it already had three coats of extra-thick clear lacquer, but all the others were just white paint so they would be easy (I thought).  A couple of nights' worth of inspection, cussing, sanding, cussing, and reviewing later, I had the photo below (there were more patches on the reverse side of each panel):


As you can see, there were more than just a few spots where I should've done some surface prep.  I spent an entire evening on each of the spots on the front panel, carefully scraping all loose paint from their edges, then sanding down the edges with three different grades of sanding sponges so there wouldn't be any sharp edges between old and new paint, then lightly sanding the paint outside the edges to ensure old & new sprays would blend seamlessly.

Having already experienced the phenomenon of overspray, I knew I'd have to protect the two Olafs when I reapplied the white paint.  I spent part of one evening reading about different types of masking tape online, then spent close to an hour in the paint supply aisle of the local Home Depot reading all the fine print on the labels of every. single. type.  of masking tape they had available. I bought a roll guaranteed to not damage painted surfaces, not leave any residue, and not react chemically with any paints (a bargain at $8.49) and headed home with high hopes.

I carefully applied the tape as lightly as I dared, covering each of the Olaf images a tiny bit at a time, until I was certain I could protect the rest with a piece of paper. I checked the alignment of the tape one last time before spraying, and noticed one piece wasn't where I wanted it.  I carefully, gently, nervously lifted the inch-long piece of tape to reposition it...

...and completely, totally, thoroughly broke my own heart (again). Where the tape had been was the bright yellow original surface of the Trogen, and the white paint (with colored bit of Olaf) that had been there was stuck fast to the back of the tape. All too late I realized that the patches I had oh-so-carefully prepared for repainting were not the only ones where the spray paint hadn't adhered to the surface I had left unprepared -- they were simply the most obvious.  NONE of the white paint had adhered to the surface of the Trogen, and as I began removing bits of tape with increasing speed, anger, and ferocity, the two Olafs were nearly obliterated.

By the time I'd stopped yelling(!) at the panel in front of me and had all the tape I'd used balled up in my hand, it was obvious even to my fevered mind that the one, the only, the absolutely necessary way to continue with the project was to START ALL OVER AGAIN FROM THE BEGINNING.  (I think the phrase actually appeared in the middle of my living room, floating in bright neon red a couple of feet below the ceiling until I blinked it away.)

I took a few minutes to get my heart rate back down into double digits and looked around.  There were patches of powered white paint scattered around the living room carpet where I'd been doing my sanding.  There were Trogen panels leaning against the rail in the entryway, Trogen panels sitting on boxes in the living room, and Trogen panels leaning on the wall in the dining room.  There were assorted sanding sponges, stencils, markers, pencils, rulers, and other tools all over the place... Everything but the completed toy chest I had been expecting to be looking at by now.

With a knot in my stomach, I consulted a calendar.  I had started the project with almost three months before the deadline, then had a total fail with Version 1.0 ( the Apa boxes), and now had a total fail with Version 2.0 (peeling paint).  The sanding and long-overdue surface prep was going to take a lot of time and effort; I only had enough space to paint a couple of panels at a time; each coat of paint needed time to cure before I could spray over it; each Olaf would take an hour or more to complete; and I still had no idea how to space out the stencils for the top panel...

...and I was into the last week of May, with Miri's birthday looming on June 20th.

NEXT: In which our hero overcomes adversity, battles insomniac insanity, repeatedly begs forgiveness from a six-year-old child, and eventually achieves his goal while feeling only slightly wiser but a whole lot older...!


Tuesday, October 20, 2015

The Saga of the Toy Chest, Part 1

A while back, I mentioned that I had been working on a birthday gift for the Pipsqueak and would write about it... and the time has finally come for me to stop editing and hit "Publish," so here we go...

The saga begins in my sister's living room, where Miri's toys have completely taken over what used to be the neatest of the family's abodes. For some reason, one day I suddenly realized that many of the containers were open boxes and baskets that occupy as much space as what they're holding without any additional function (like seating, or table space).

That proverbial light bulb went on over my head.  I had been trying to decide what to get Miri for her birthday, and decided that instead of getting her more stuff I'd get her something in which to keep all the stuff she already had -- and help my sister recover a few square feet of her living room. That lightbulb was quickly followed by what I can only think of as a sudden burst of insanity: instead of buying a toy chest, I'd make a toy chest for my niece. (Readers should insert their favorite dramatic ominous music here.)

I even knew exactly how I could save all the money I didn't have in the first place:  I was going to use my Apa boxes.

IKEA used to sell wooden storage boxes called "Apa" that could double as benches. I had bought two of them, along with a few cheap pillows, to use as a storage bench for linens at the foot of my bed. Unfortunately, when I upgraded from a double bed to a queen bed the extra length turned the Apa pair from storage bench into choke point moving in & out of my room. Even worse, the oils in the wood made them useless to store linens. Somewhere in my fevered imagination I could clearly see them painted beautifully inside & out, holding scads of my niece's toys & games while also providing surfaces to use either as occasional tables or seating (even a 100+ lb adult could sit safely on one of the boxes if they sat gently).

So there I was, starting a quick and simple project in early April with a deadline of late June. Piece of cake, right?  I took my time figuring out what I'd do, settling on a white chest with lots of pictures of Olaf on it. I went to far as to try figuring out if I should use a brush, or a roller, or spray paint; bought several different types of paper to experiment with methods of transferring designs onto the white paint vs. glueing pictures vs. tracing images (I knew better than to depend on my ability to accurately draw Olaf freehand.) Eventually I decided I'd start painting the box and choose the images later. A  quick test with regular spray paint showed me I needed to use a good primer, on the slightly oily bare wood... and I made Big Mistake #1. (Probably #2, if you count deciding to make the darn thing in the first place.)

I bought a couple of cans of Kilz, which I've successfully used on all kinds of surfaces... completely forgetting that it does not leave a completely smooth surface. After blithely giving the box a good coating of Kilz inside and out, I realized that spray paint can be kinda expensive so I used an entire can of bargain-brand white enamel.

And then another.

And another.

And did some unplanned sanding, and used another can of paint.

And realized, after spending more than a week choking on paint fumes (I was doing all this indoors, of course), that This Ain't Gonna Work. No matter what I did, I was left with a surface too rough to draw on, and the paint was emphasizing every single imperfection in the surface of the box. Worse, I had so many coats of paint on the darn thing that the top could barely fit into place -- and I belatedly realized that it was perfectly designed to catch and crunch Miri's fingers.  After two weeks of fighting with paint fumes, sanding blocks, and three brands of increasingly expensive cans of white spray enamel, I had a rough-surfaced, vaguely white Apa that smelled of aerosol paint and that looked less like what I was trying to make the more I worked on it, with a top that didn't fit.

Time for Plan B.

Um... Oops. I didn't have a Plan B. The whole idea had been to use something already on hand so that I wouldn't have to shell out lots o'bucks while finishing the project in time to present a finished product to my niece on her birthday. Still thinking IKEA, I remembered seeing a toy chest in the warehouse during one of my visits (a nice, sturdy one with an attached lid that featured slow-close hinges specifically to avoid pinching small fingers).

Problem was, I didn't remember how long ago I'd seen the darn thing -- it could have even been back when I actually worked at IKEA roughly a decade earlier. (Side note: I was part of the crew that opened the College Park, MD store; my decorated hard hat sits atop a bookcase in my bedroom, and I still use the steel-toed boots & safety glasses we were required to wear during construction when I work in the yard. So yeah, I have a soft spot for the place.)

Swallowing my pride (and ignoring the whimpering of my wallet), I headed back to IKEA to buy the remembered toy chest... only to findit had long ago followed the Apa box into apparent extinction. Wandering around the store, I decided to see if there were any cute stuffed animals in the Children's department... and discovered the Trogen storage bench.

It's small enough to fit in AJ's living room... has a slow-close lid and cutouts to give little hands & fingers plenty of room... doubles as a relatively sturdy bench... and has a nice, smooth surface with lots of room for pictures of Olaf. Okay, the darn thing only comes in day-glo yellow, but that's what paint is for, right...?

About $80 and an hour later later I happily unboxed the new target of my spray-painting aspirations and began figuring out which Olafs would go best on which surface. I added at least one or two coats of clear lacquer over the designs to my painting plans, but had already spent so much on cheap paints with no love given in return that I decided to use more expensive spray enamel -- and also discovered that I could easily transfer line drawings onto the surface of the chest with graphite paper (like old-fashioned carbon paper but erasable like pencil). I bought a few cans of Rustoleum 2X Ultra Cover (Also bonds to plastic! No primer needed!) and got to work.

And made Big Mistake #2 and Big Mistake #3. In no particular order, I started spray-painting in the entryway of my house with a tarp on the floor but nothing protecting the nearby walls, railing or furniture -- and decided to save some time and money by skipping any surface preparation steps beyond making sure it was clean. I managed to turn one panel from bright yellow to a nice, smooth, even semi-gloss white...


...and while admiring my handiwork, realized that I was also turning the oak railing that separates the foyer from the living room a nice, smooth, even semi-gloss white as well. A quick dive into my paper recycling boxes and lot of masking tape later, I had the railing & couch protected. It wasn't pretty, but it allowed me to start painting "for real" and I went to town.  Using small boxes to hold the various panels up off the floor, over the next several days I slowly turned the yellow Trogen into a white Trogen.

Now it was time to try getting Olaf onto the Trogen. (Hey, at least they share a vague geographic commonality!)  Having spent about $20 on samples of different paper I was going to use to either glue pictures onto the wood or to create my own stencils (yes, I actually thought I'd create my own stencils at one point, as if further proof of my insanity was needed), I shelled out a few dollars more for a fine point paint marker and a full set of reusable alphabet & punctuation stencils.

All supplies on hand, I selected & printed a few Olaf images from some coloring pages I'd downloaded for last year's "Frozen" themed party and got ready to trace them onto the various Trogen panels. I decided to start on the front, so after vacuuming a part of the carpet to make it extra-clean I laid everything out and... hey, what's that...?

The "that" was a series of rough spots I could feel as I ran my hand over the panel. Holding a flashlight parallel to the surface, I found several patches where all that lovely white enamel guaranteed to stick to almost anything without primer had unstuck itself from whatever magical kid-proof enamel IKEA used and had formed patches of bubbles, totally unsuitable for drawing on and guaranteeing later failure of the paint job. Rueing my decision to not go through the usual surface preparation before applying paint, I began sanding down the rough spots. (Did I mention the $15 I spent on various grades of sanding sponges?)  No big deal, I thought; I'd re-spray, let it dry & cure for about 12 hours, and get back to Olafing the chest.

I decided to run a couple of tests during the wait, so I pulled the first sheet of graphite paper from the pack, grabbed the panel that would be the (usually unseen) bottom of the box, and traced a few Olaf faces onto it. Gorgeous!  The four small images taught me what I needed to know about handling the paper & gave me some ideas to make the tracing easier... so now let's see how that fine-pint paint marker works, shall we...?

It worked, all right -- but the "fine point" turned out to be a chisel point that made drawing thin detail lines absolutely impossible no matter how careful I was.  Whilst saying numerous very impolite things to no one in particular, I noticed a plain ol' black Sharpie marker on the table nearby-- and it worked like a charm.  Since this was the bottom of the box, I wasn't too worried about one Olaf face being nicely detailed while another looked like a cave painting and two others were unfinished.  It worked, and that was all that mattered at that point.

By this time I was a little gun-shy about all things spray enamel, so I couldn't be sure the Sharpie ink wouldn't run when I sprayed clear lacquer over it. This resulted in delay until I could get to the store and buy a can of the stuff to test it with. (Have you noticed how many purchases I've made for my "cheap" project so far...?) Amazingly, the clear enamel worked exactly as advertised, so after all my work I had... the bottom panel completed, and a living room that smelled like spray paint and was filled with unassembled panels without any artwork on them.

And "early April" had suddenly become "early May" and the clock, it was was a-tickin'...

Next: How to Draw Olaf and Break Your Own Heart!